There are few blogging platforms built with Node.JS. The best known is probably Ghost. - it's core strength but also weakness lies in it's motto:
"Just a blogging platform"
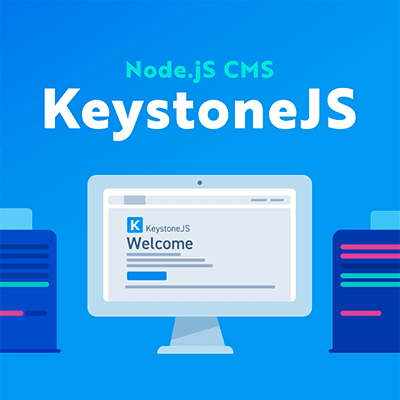
If you need just a blog, I highly recommend using Ghost, but if you want to run a website or launch a web app with a blog, Keystone.js is a way to go. It is one of the best CMS out there written with Node.js on the backend. Out of the box generated app comes with blog set up, but it has few flaws - it's not SEO and social media friendly, it has very basic look and no support for social sharing. This guide will show you how to fix it with few lines of code and take Keystone on par with Ghost platform.
1. Install keystone.js
The best way to install keystone is with yeoman generator. In console run these commands:
$ npm install -g generator-keystone
$ mkdir myproject
$ cd myproject
$ yo keystone
See more details if got in trouble.
2. Run keystone and write first post
After answering all generator questions run the app with the following command:
node keystone (or npm start)
Now we can log in to Admin UI (by default at http://localhost:3000/keystone) and quickly create a new post. After publishing it's immediately visible under /blog route. Magic! Of course CMS can't be compared to WordPress or other PHP based systems but it's highly configurable and makes developing custom web apps and admin UIs very easy.
There are few important parts which are missing from a well set up and nicely looking blog:
- beautiful and easy to read
- optimized for SEO and social networks
- social shares
3. Modify keystone app to improve blogging
3.1. Styling
Nothing much to say here, play with styles. Default bootstrap theme is very simple. I recommend to find a free or paid template based on bootstrap and tweaking blog and post templates (in jade, handlebars or other templating engine you have chosen when generating app).
3.2. SEO and social optimization
By default, Keystone.js doesn't modify <title> and <meta description> for every page. But if you know at least something about how Google and other search engines crawl and index pages you know that it's important to have customized meta tags for every post.
As we generally want to have different things in h1, title and description, I have added 2 more fields in to Post model:
Post.add({
    ...
    meta: {
        title: { type: String},
        description: { type: String}
    },
    categories: { type: Types.Relationship, ref: 'PostCategory', many: true }
});
There are simple strings and it is recommended to keep title under 70 characters and description under 160.
The main work is then done in default.hbs (I've used handlebars as a templating engine). Title and description is populated from our 2 new fields. If they are not specified we will get them from post.title and post.content.brief. All categories specified for the post are used as keywords.
The code below will make a solid base for your blog posts to be indexed by search engines and properly handled by facebook open graph and twitter cards.
{{#if data.post}}
    {{#if data.post.meta.title}}
        <title>{{data.post.meta.title}}</title>
        <meta property="og:title" content="{{data.post.meta.title}}">
        <meta name="twitter:title" content="{{data.post.meta.title}}">
    {{else}}
        <title>{{data.post.title}}</title>
        <meta property="og:title" content="{{data.post.title}}">
        <meta name="twitter:title" content="{{data.post.title}}">
    {{/if}}
    {{#if data.post.meta.description}}
        <meta name="description" content="{{data.post.meta.description}}">
        <meta property="og:description" content="{{data.post.meta.description}}">
        <meta name="twitter:description" content="{{data.post.meta.description}}">
    {{else}}
        <meta name="description" content="{{data.post.content.brief}}">
        <meta property="og:description" content="{{data.post.content.brief}}">
        <meta name="twitter:description" content="{{data.post.content.brief}}">
    {{/if}}
    <meta property="og:type" content="article">
    <meta name="twitter:card" content="summary_large_image">
    <meta property="og:image" content="{{data.post.image.url}}">
    <meta name="twitter:image:src" content="{{data.post.image.url}}">
    <meta property="og:url" content="{{data.post.fullPostUrl}}">
    <meta name="twitter:url" content="{{data.post.fullPostUrl}}">
    <meta property="article:published_time" content="{{data.post.publishedDate}}">
    {{# each data.post.categories}}
        <meta property="article:tag" content="{{name}}">
    {{/each}}
    <meta name="keywords" content="{{# each data.post.categories}}{{name}}, {{/each}}">
{{else}}
    <title>general title</title>
    <meta name="description" content="general description">
    <meta property="og:image" content="{{baseUrl}}/images/logo.png">
    <meta name="twitter:image:src" content="{{baseUrl}}/images/logo.png">
    <meta name="keywords" content="Node.js, development, api">
{{/if}}
With this code, your blog post will show similar meta tags for browsers and web crawlers as on image below:

3.3. Social shares
It's a good practice to allow your blog readers to share posts on social media. Adding social buttons to the blog post is easy. The small problem occurs when you want to build social share links. All providers require full url to your blog post provided as a parameter for their share url. To get the blog url we need a base url and a blog post slug.
Let's first define a baseUrl property so we have it available in keystone context and in every template. Then we use this url to define a virtual field fullPostUrlon Post collection:
//in keystone.js
keystone.set('baseUrl', (keystone.get('env') == 'production') ? 'https://nodevision.com.au/' : 'http://localhost:3000/');
//in routes/middleware.js in initLocals function
locals.baseUrl = keystone.get('baseUrl');
//in models/Post.js
Post.schema.virtual('fullPostUrl').get(function() {
return keystone.get('baseUrl') + 'blog/post/' + this.slug;
});
After we get fullPostUrl, we can add social buttons to our post.hbs template:
<a class="ion-social-twitter" href="https://twitter.com/intent/tweet?text={{data.post.title}}&url={{data.post.fullPostUrl}}" onclick="window.open(this.href, 'twitter-share', 'width=550,height=235');return false;">
</a>
<a class="ion-social-facebook" href="https://www.facebook.com/sharer/sharer.php?u={{data.post.fullPostUrl}}" onclick="window.open(this.href, 'facebook-share','width=580,height=296');return false;">
</a>
<a class="ion-social-googleplus" href="https://plus.google.com/share?url={{data.post.fullPostUrl}}" onclick="window.open(this.href, 'google-plus-share', 'width=490,height=530');return false;">
</a>
3.4. (Optional) Add markdown field to a post
If you are not a fan of wysiwyg editors, you can easily add markdown support for your posts in Admin UI.
In models/Post.js add content.markdown:
content: {
    brief: { type: Types.Html, wysiwyg: true, height: 150 },
    extended: { type: Types.Html, wysiwyg: true, height: 400 },
    markdown: { type: Types.Markdown, height: 400 }
},
and then in the template file templates/post.hbs add:
<div class="post">
    {{#if data.post.content.markdown.html}}
        {{{data.post.content.markdown.html}}}
    {{else}}
        {{{data.post.content.extended}}}
    {{/if}}
</div>
These 2 changes will modify Admin UI to look as on the image below and markdown content will take preference before a wysiwig content.

Summary
After doing these few steps, you have turned a basic keystone demo app in to a solid blogging platform which is on par with dedicated blogging platforms like Ghost and should outperform any "not well configured" Wordpress blogs. The website https://nodevision.com.au/blog is a live example of what can be achieved with Keystone.
Happy blogging!
If you have any comments how to improve blogging with Keystone.js even more, please leave a comment.


